
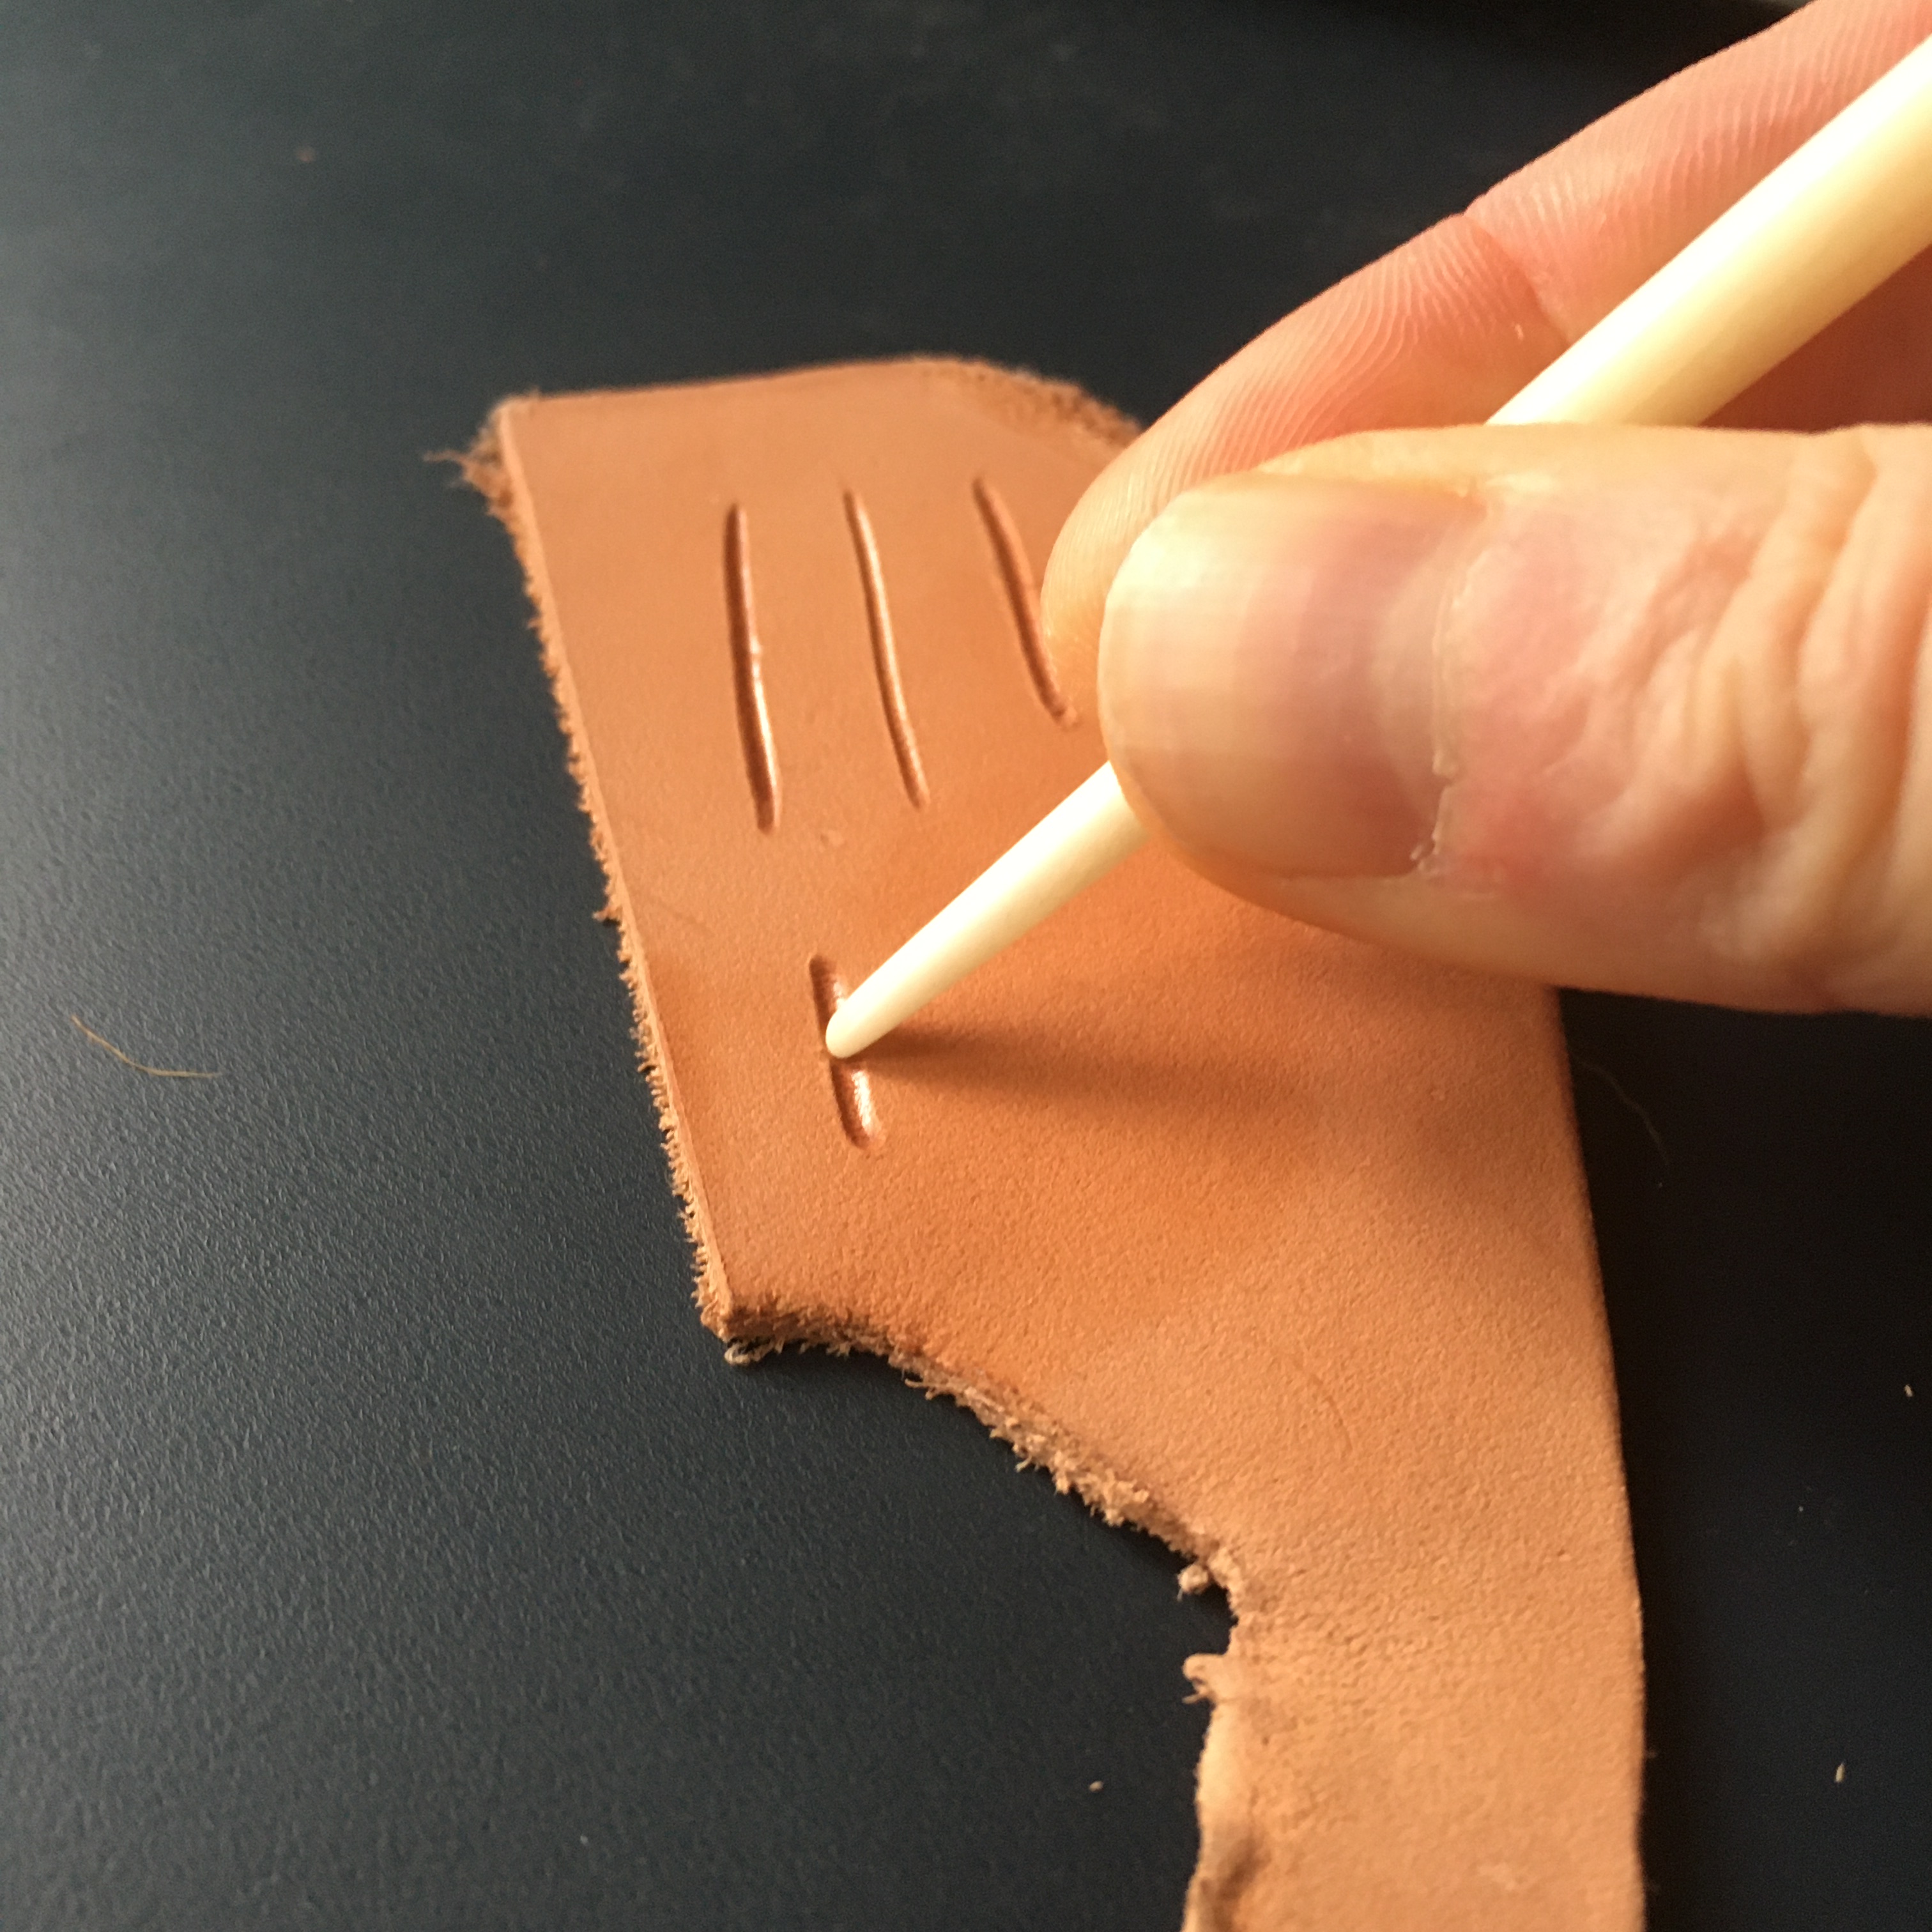
“The most commonly used decorative device on leather was tooling, whereby a design was impressed on to the surface of dampened leather using a blunt point.”
Esther Cameron, Leather and Leatherworking in Anglo-Scandinavian and Medieval York
This is intended as part of a larger tutorial series that covers the construction and decoration of sheathes for the Norse and Anglo-Saxon spheres in what SCA folks refer to as “Early Period.” It was originally put together as a class handout but with all events cancelled due to the Current Plague, I’ve tried to adapt it for online use. Eventually I’ll post the module for the wet-molding and stitching of the sheath itself (this will include examples of both decorated and plain sheathes from Dublin and Hedeby using the earlier side-seam method as well as the slightly later back seam version), but for now, this is the decoration module. It is geared toward sheathes, since those are the most common type of decorated leather item in the archaeological record. We don’t have a whole lot of evidence for this on belts or pouches, and unless you’re copying an actual find, I can’t guarantee that you’re making a completely historically accurate piece of kit. This tutorial is just meant to introduce you to a documented decoration method, show you how to do it with simple, handy tools, and practice some easy motifs based on historical examples. You can make your own choices about what else you would like to decorate.
Keep scrolling for a little bit of background about the difference between modern, late-medieval, and early-medieval leather tooling techniques, or…
A lot of modern leatherwork is cut and beveled – a design is first sliced shallowly into the surface, then the material on one side of the cut is beveled to create relief. Sometimes background textures are created using stippled patterns or “seeders” as well. Later in the Middle Ages, decoration with cut lines and seeded backgrounds became more popular, but this was not the case earlier on. The archaeologists who compiled the info on leather finds in Anglo-Scandinavian York were quite clear on this point – decoration is almost exclusively impressed into the surface of damp leather with a blunted tool. Not cut and beveled, not elaborately seeded or stamped. What does this mean? You don’t need a ton of specialized tools! With a knitting needle (and a nail set for slightly later stuff), you can execute just about all the design examples shown Leather and Leatherworking in Anglo-Scandinavian and Medieval York, so if your persona is 8th-12th century, don’t feel like you need to be a wizard to decorate some leather in a way that would absolutely have been practiced at the time.
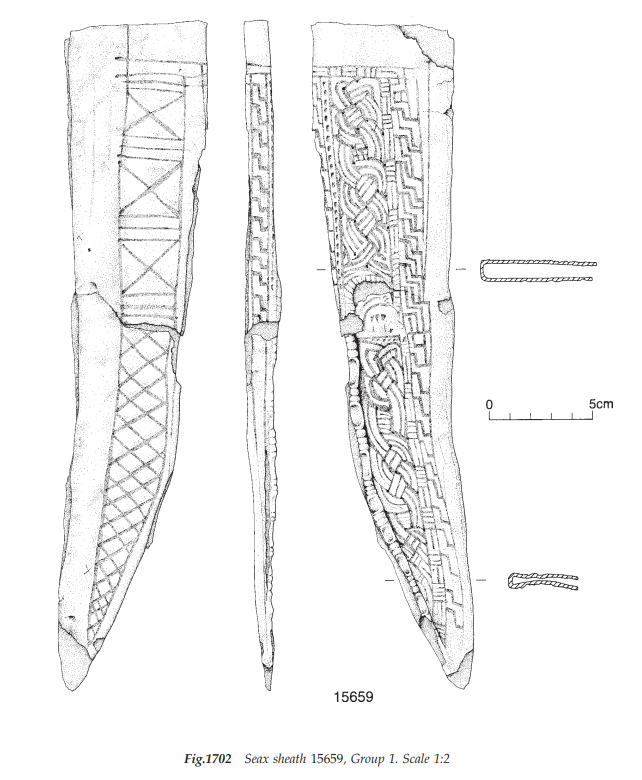
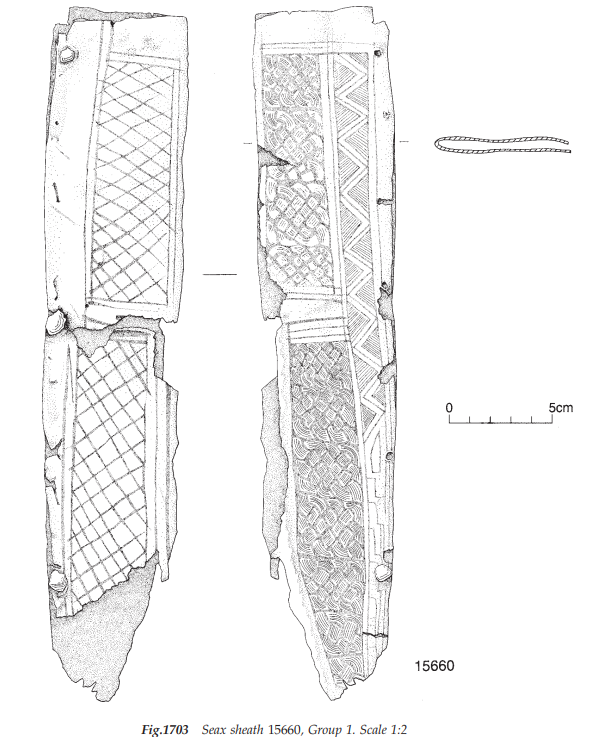
Another thing to keep in mind is that many of the most dazzling examples of sheathes that survived were high-status items executed by top-notch craftspeople but for low- or mid-status personas, this isn’t really necessary. At York, most of the more intricately decorated sheathes are also from seaxes rather than smaller utility/eating knives, so making a simpler sheath for your utility knife can be a great way to make a period-appropriate item that is less daunting for a beginner.
In looking at some of the following examples, you’ll see that the execution is not “perfect” to our modern eyes – angles are not perfectly 90 degrees, spacing isn’t exact to the millimeter. Some of this can be due to wear and deterioration of the object after it was interred or discarded, but sometimes it just means that the work was made by someone who, for whatever reason, did not need to work to a mathematical level of precision. This same aesthetic issue sometimes comes up in other A&S disciplines like Scribal Arts – methods of filling up space, fixing mistakes, or cramming in decoration in ways that look weird to a modern eye were quite common, and for every perfect Harley Psalter, there were also many manuscripts executed by artists who were far less skilled.
In short: Imperfection is Perfectly Period. Don’t be intimidated, make yourself a cool thing. And by the time you’ve finished it, you’ll have learned enough to do a second one that is much better. Make that thing too.
This tutorial assumes you may have some prior experience with tooling leather. If not, here’s the quick summary:
- Use vegetable tanned leather (cowhide works best and is the most widely available option). Other stuff won’t really work for tooling. It comes in a range of thicknesses measured in ounces – different projects will have different needs (here’s a great explanation of how that all works). For a wet-molded sheath for a small knife, I like something in the 4 to 6 oz range, but for a larger seax sheath, I might go a bit thicker.
- Get it damp first. Using room temperature water on a sponge or clean cloth, moisten the smooth (grain) side of the leather gradually until your last wipe of water takes a few seconds to fully absorb. Then ignore it for a while. Dampen it enough to darken up again before you start tooling, and don’t try to tool it if it’s either too dry or squishy-wet.
- Trim your nails. Damp veg-tan holds an impression well, including accidental nicks and gouges from fingernails, or even the impression of coarse fabric you lean on atop the leather. Marks are a real pain to smooth out and it’s a lot easer to not put them there in the first place.
Now to get down to the basics:
Assemble some tools
Here are some bone tools believed to have been used for leatherworking, displayed by the National Museums of Scotland.
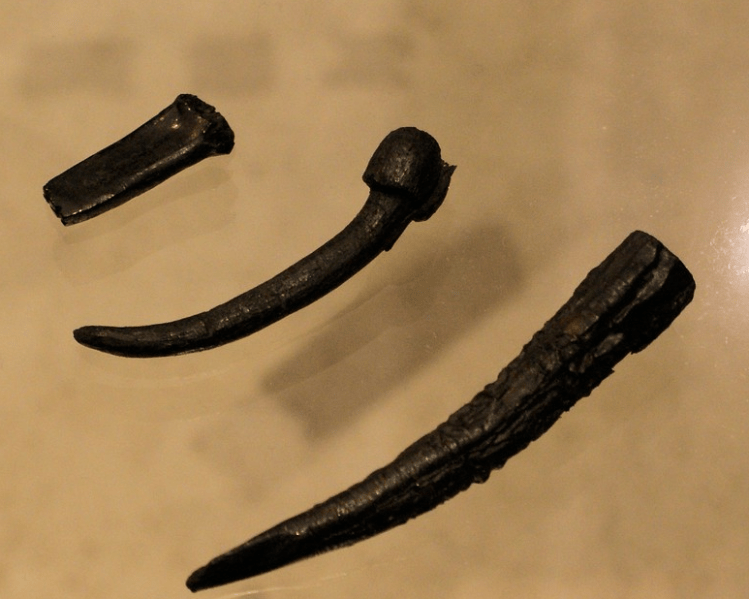
As you can see, they’re not particularly complicated. In looking around your home, you’ve probably got something that fits the bill. The characteristics to look for are: pointed but not sharp (don’t want to tear the leather) and a material that is smooth and can withstand a lot of repeated pressure. The best tools, in my experience, are the ones that have the least amount of friction between the tool-tip and the leather. If you do change the shape a bit, make sure you have some way of burnishing it smooth again – if it is rough from sandpaper, it will give you trouble.
- Knitting needles – bamboo, plastic, or metal ones all work. The only downside to metal is that it’s a little harder to reshape if you want the tip slightly blunter or sharper.
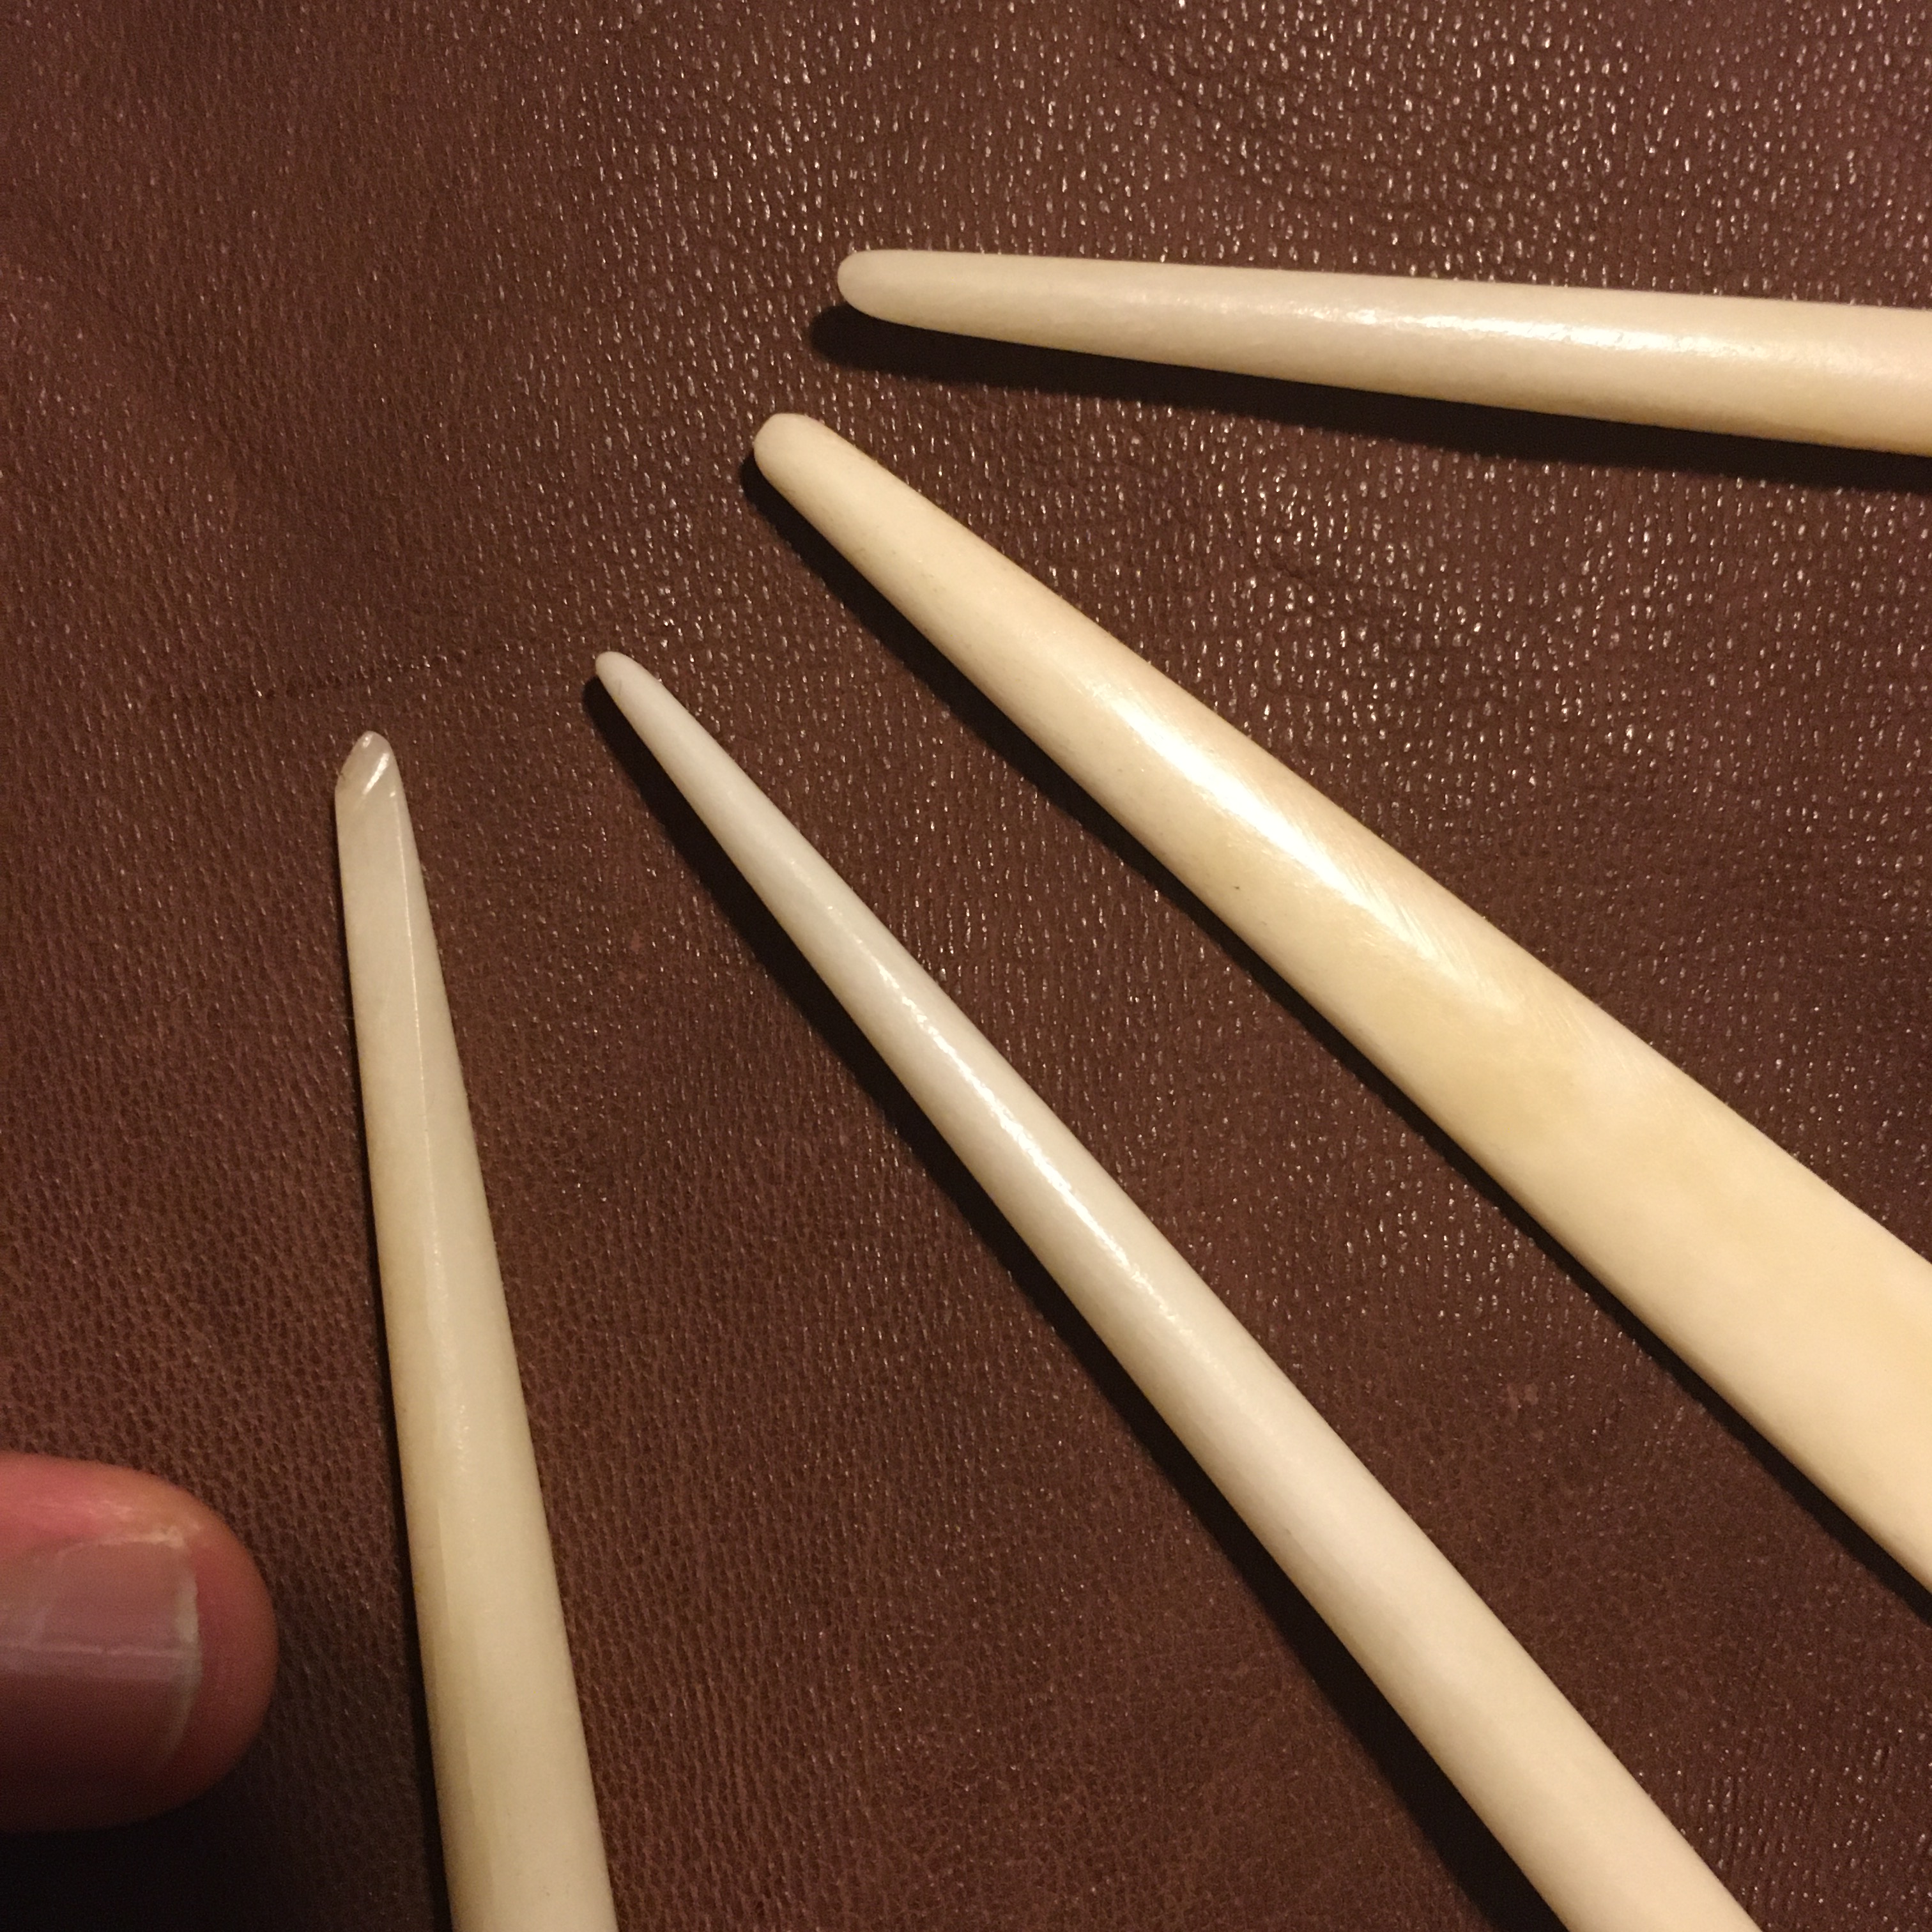
- Hairsticks/shawl pins – wood or bone ones are great. My all-time favorite are those bone hairsticks sold online. I use fine grit sandpaper to reshape as needed (use appropriate caution, don’t inhale the dust), then burnish them smooth by rubbing them on a metal surface.
- Other things that also work: tapestry needles, nalbinding needles, antler tips (if you can get a fine enough point on it) pieces of plastic pens, plastic utensils, a random stick
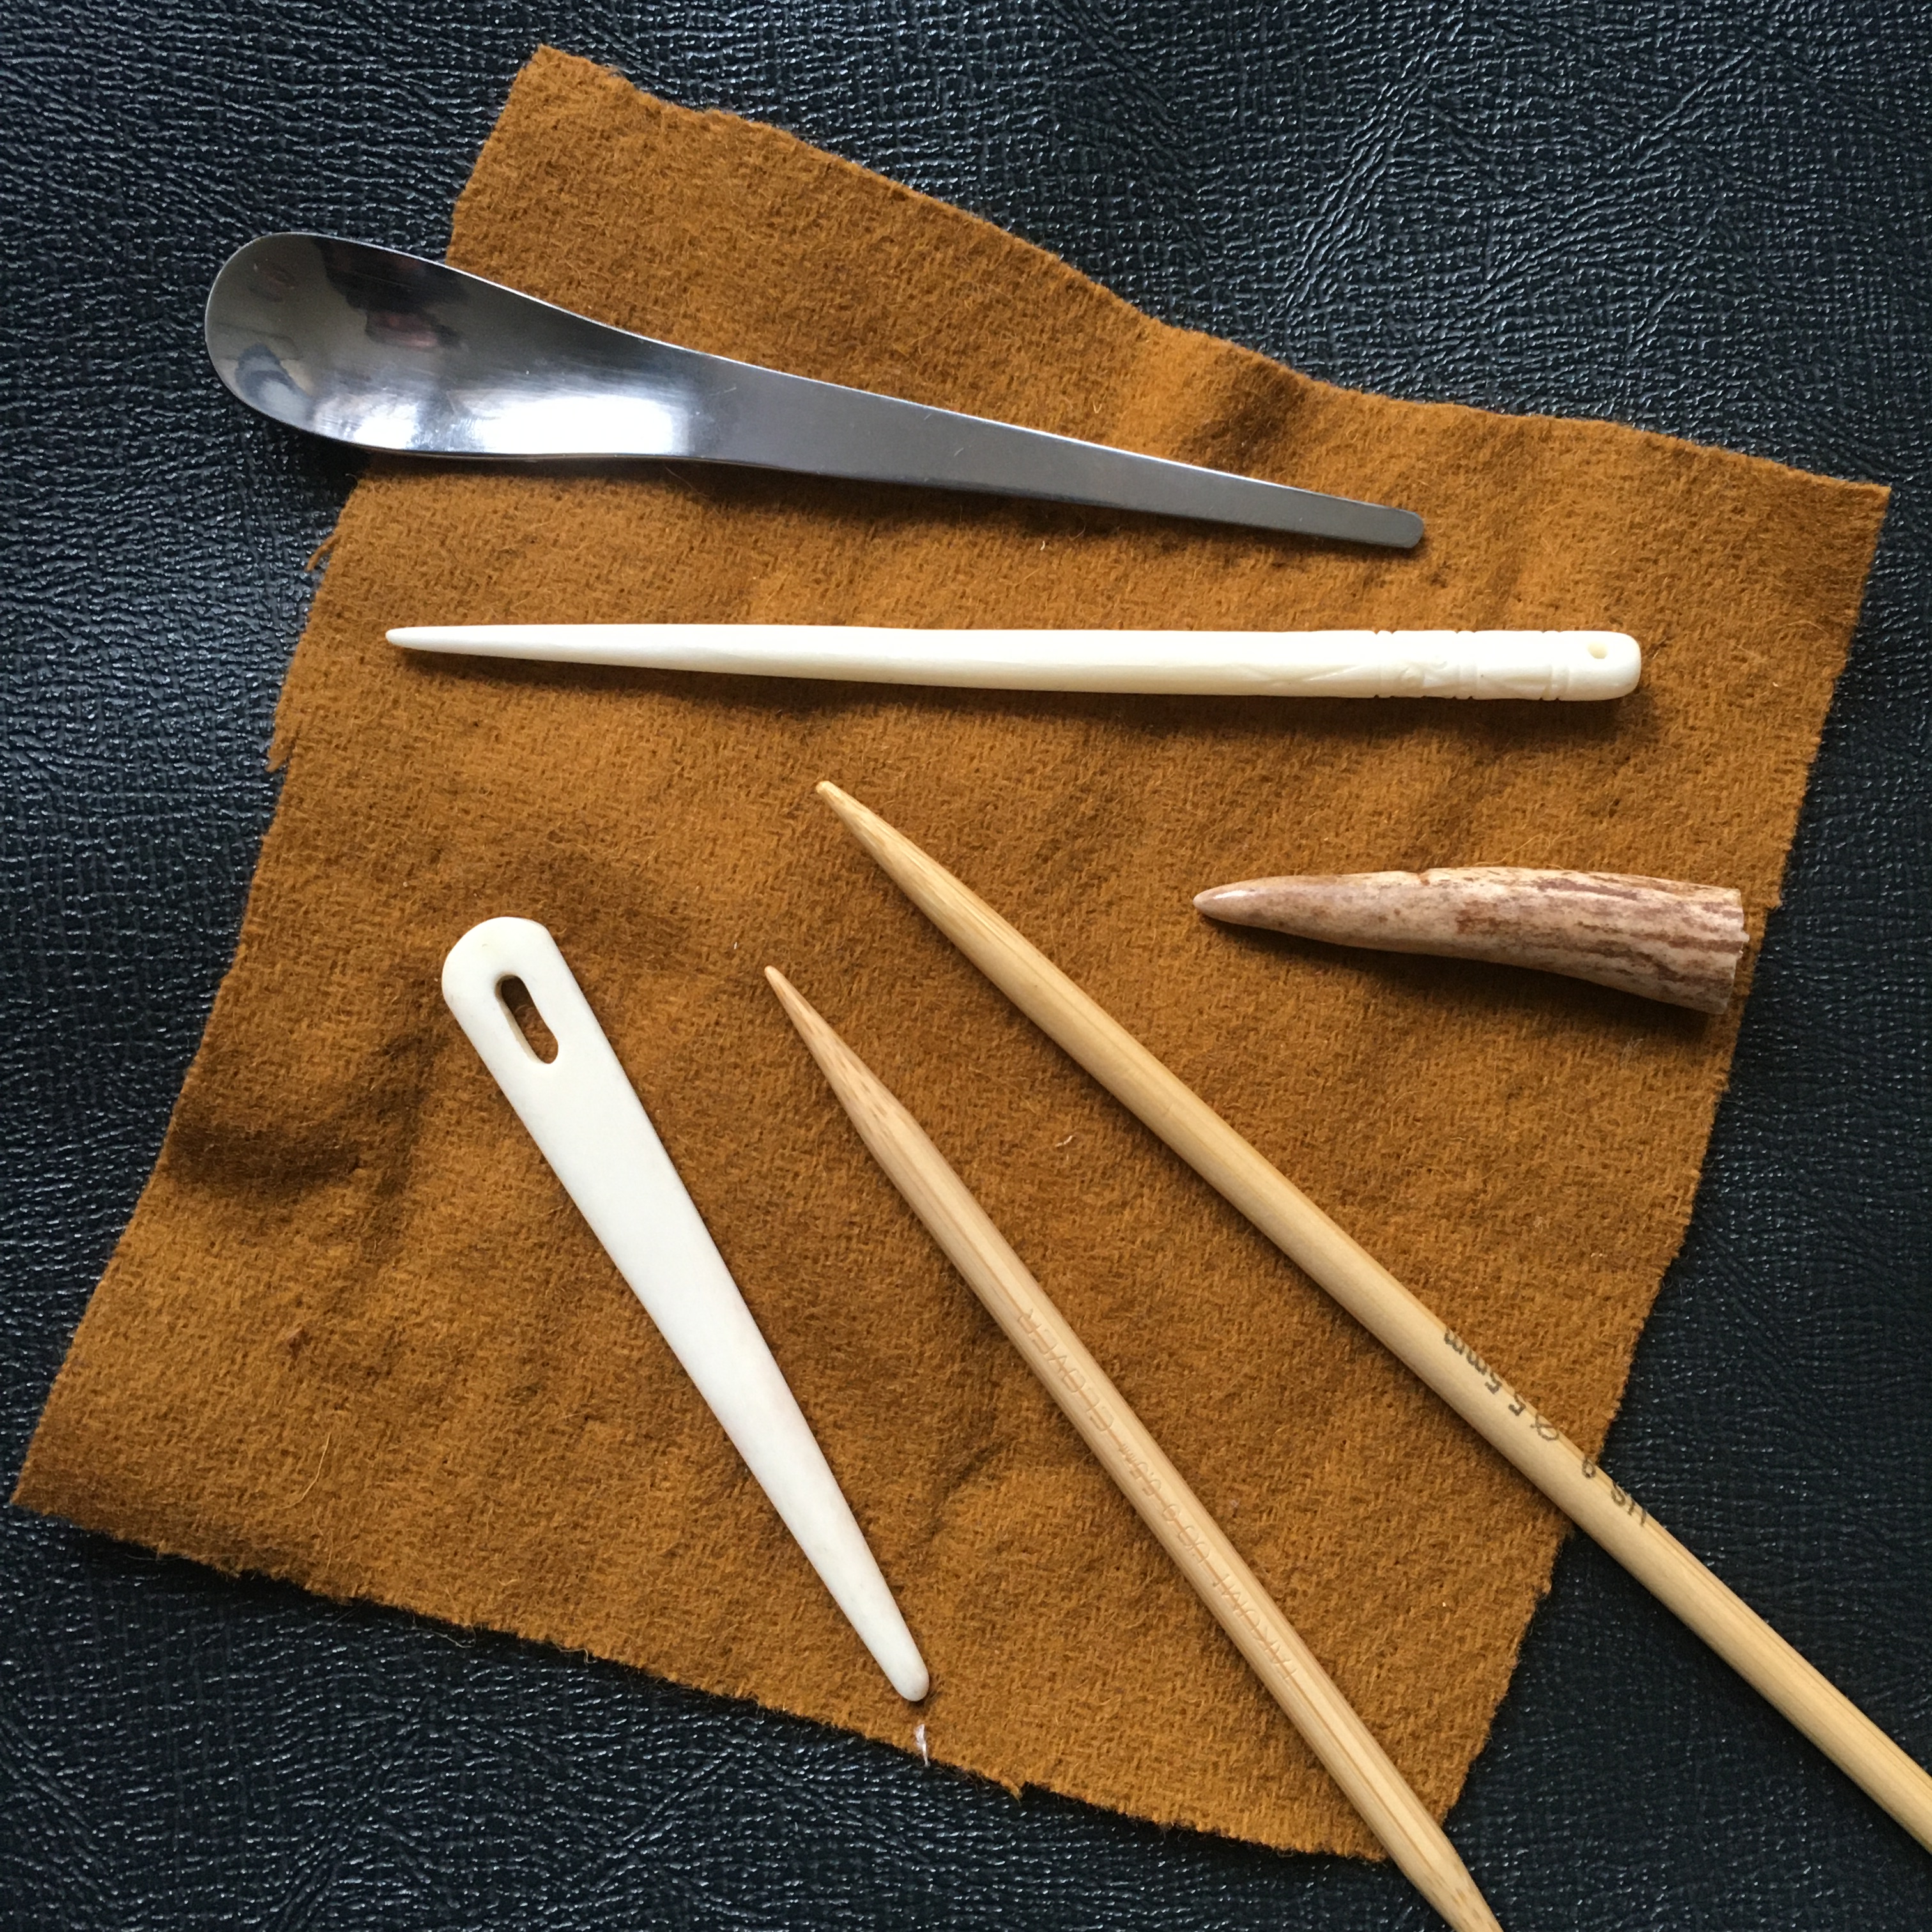
At left are the bone implements I’ve made – one with a slightly angled chisel tip, the others are varying dull points. At right are some random things that I’ve used – a bone nalbinding needle, some bamboo knitting needles, a small antler tip, a hair stick, and a weird little teaspoon I think I swiped from an airplane (sorry).
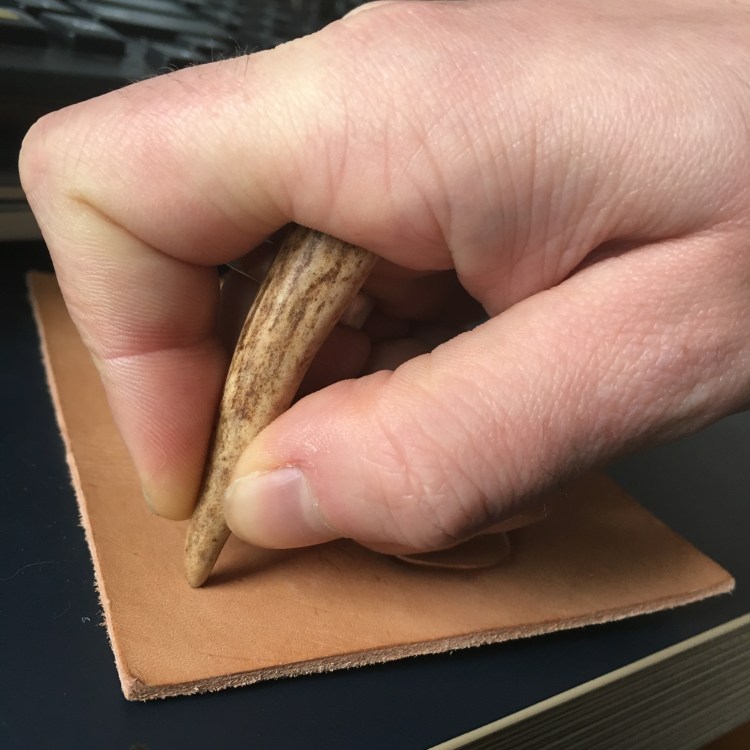
Starting out, holding the tool like a pencil is often the most intuitive thing to do. If you find your hand is cramping up or if you have a history of grip-related issues, another option is to use something shorter so that the butt end presses against your palm. A short bit of sharpened antler tine can work well (see below), or you can socket a tip in a chunk of wood (similar to a stubby awl) or use a piece of leather or a plastic bottle cap to protect your palm and help distribute the pressure.
Other than that, you just need a firm surface to work on and some water and a sponge/rag. Since you aren’t pounding or stamping anything, you don’t need a piece of granite or anything like that. I use scrap wood or a crafting mat.
Basics of tool handling
Heavy lines vs. light lines
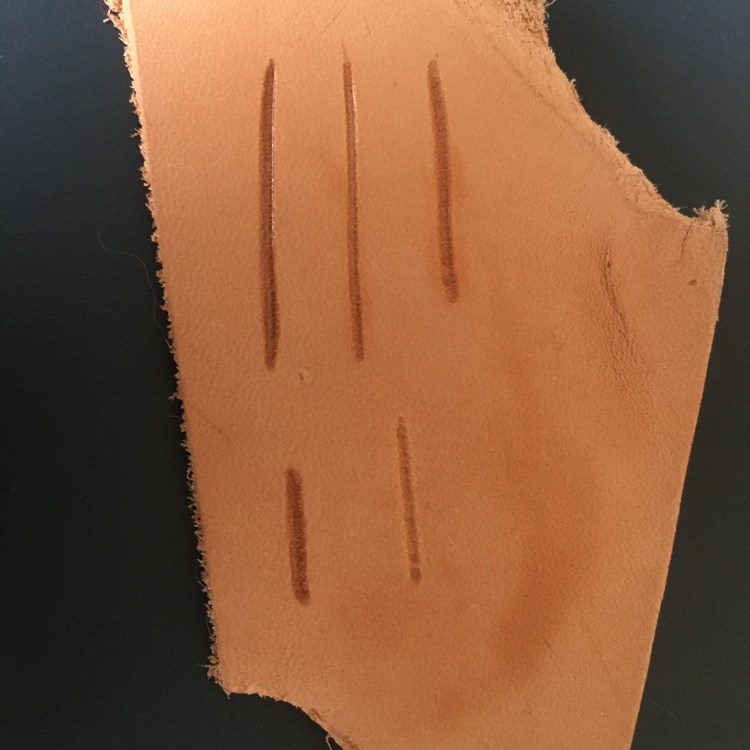
This can be a function of either the tool width/sharpness, the amount of pressure applied, or both. On a scrap of dampened leather, take whatever tool(s) you plan to use and practice making as many different kinds of marks as you possibly can. As you do so, pay attention to how hard you’re pressing, what angle you’re holding the tool at, whether you’re pushing or pulling, and how fast you move. In the end, it will probably come down to personal preference – what’s most comfortable for you, and what you can do most consistently. For dots, try pressing straight down firmly as well as a twisting the point with a lighter pressure and see what you prefer.
By going over a line repeatedly (and quickly), you can actually start to burnish the base of the groove, which can darken the leather slightly. In my experience, this is best done on straight line segments, where you can go back and forth rapidly with less than the maximum amount of pressure.
If you want to use a straight-edge as a guide, just about anything will do, but make sure to test it on scrap first to see how much of an offset it creates.
Line Interaction
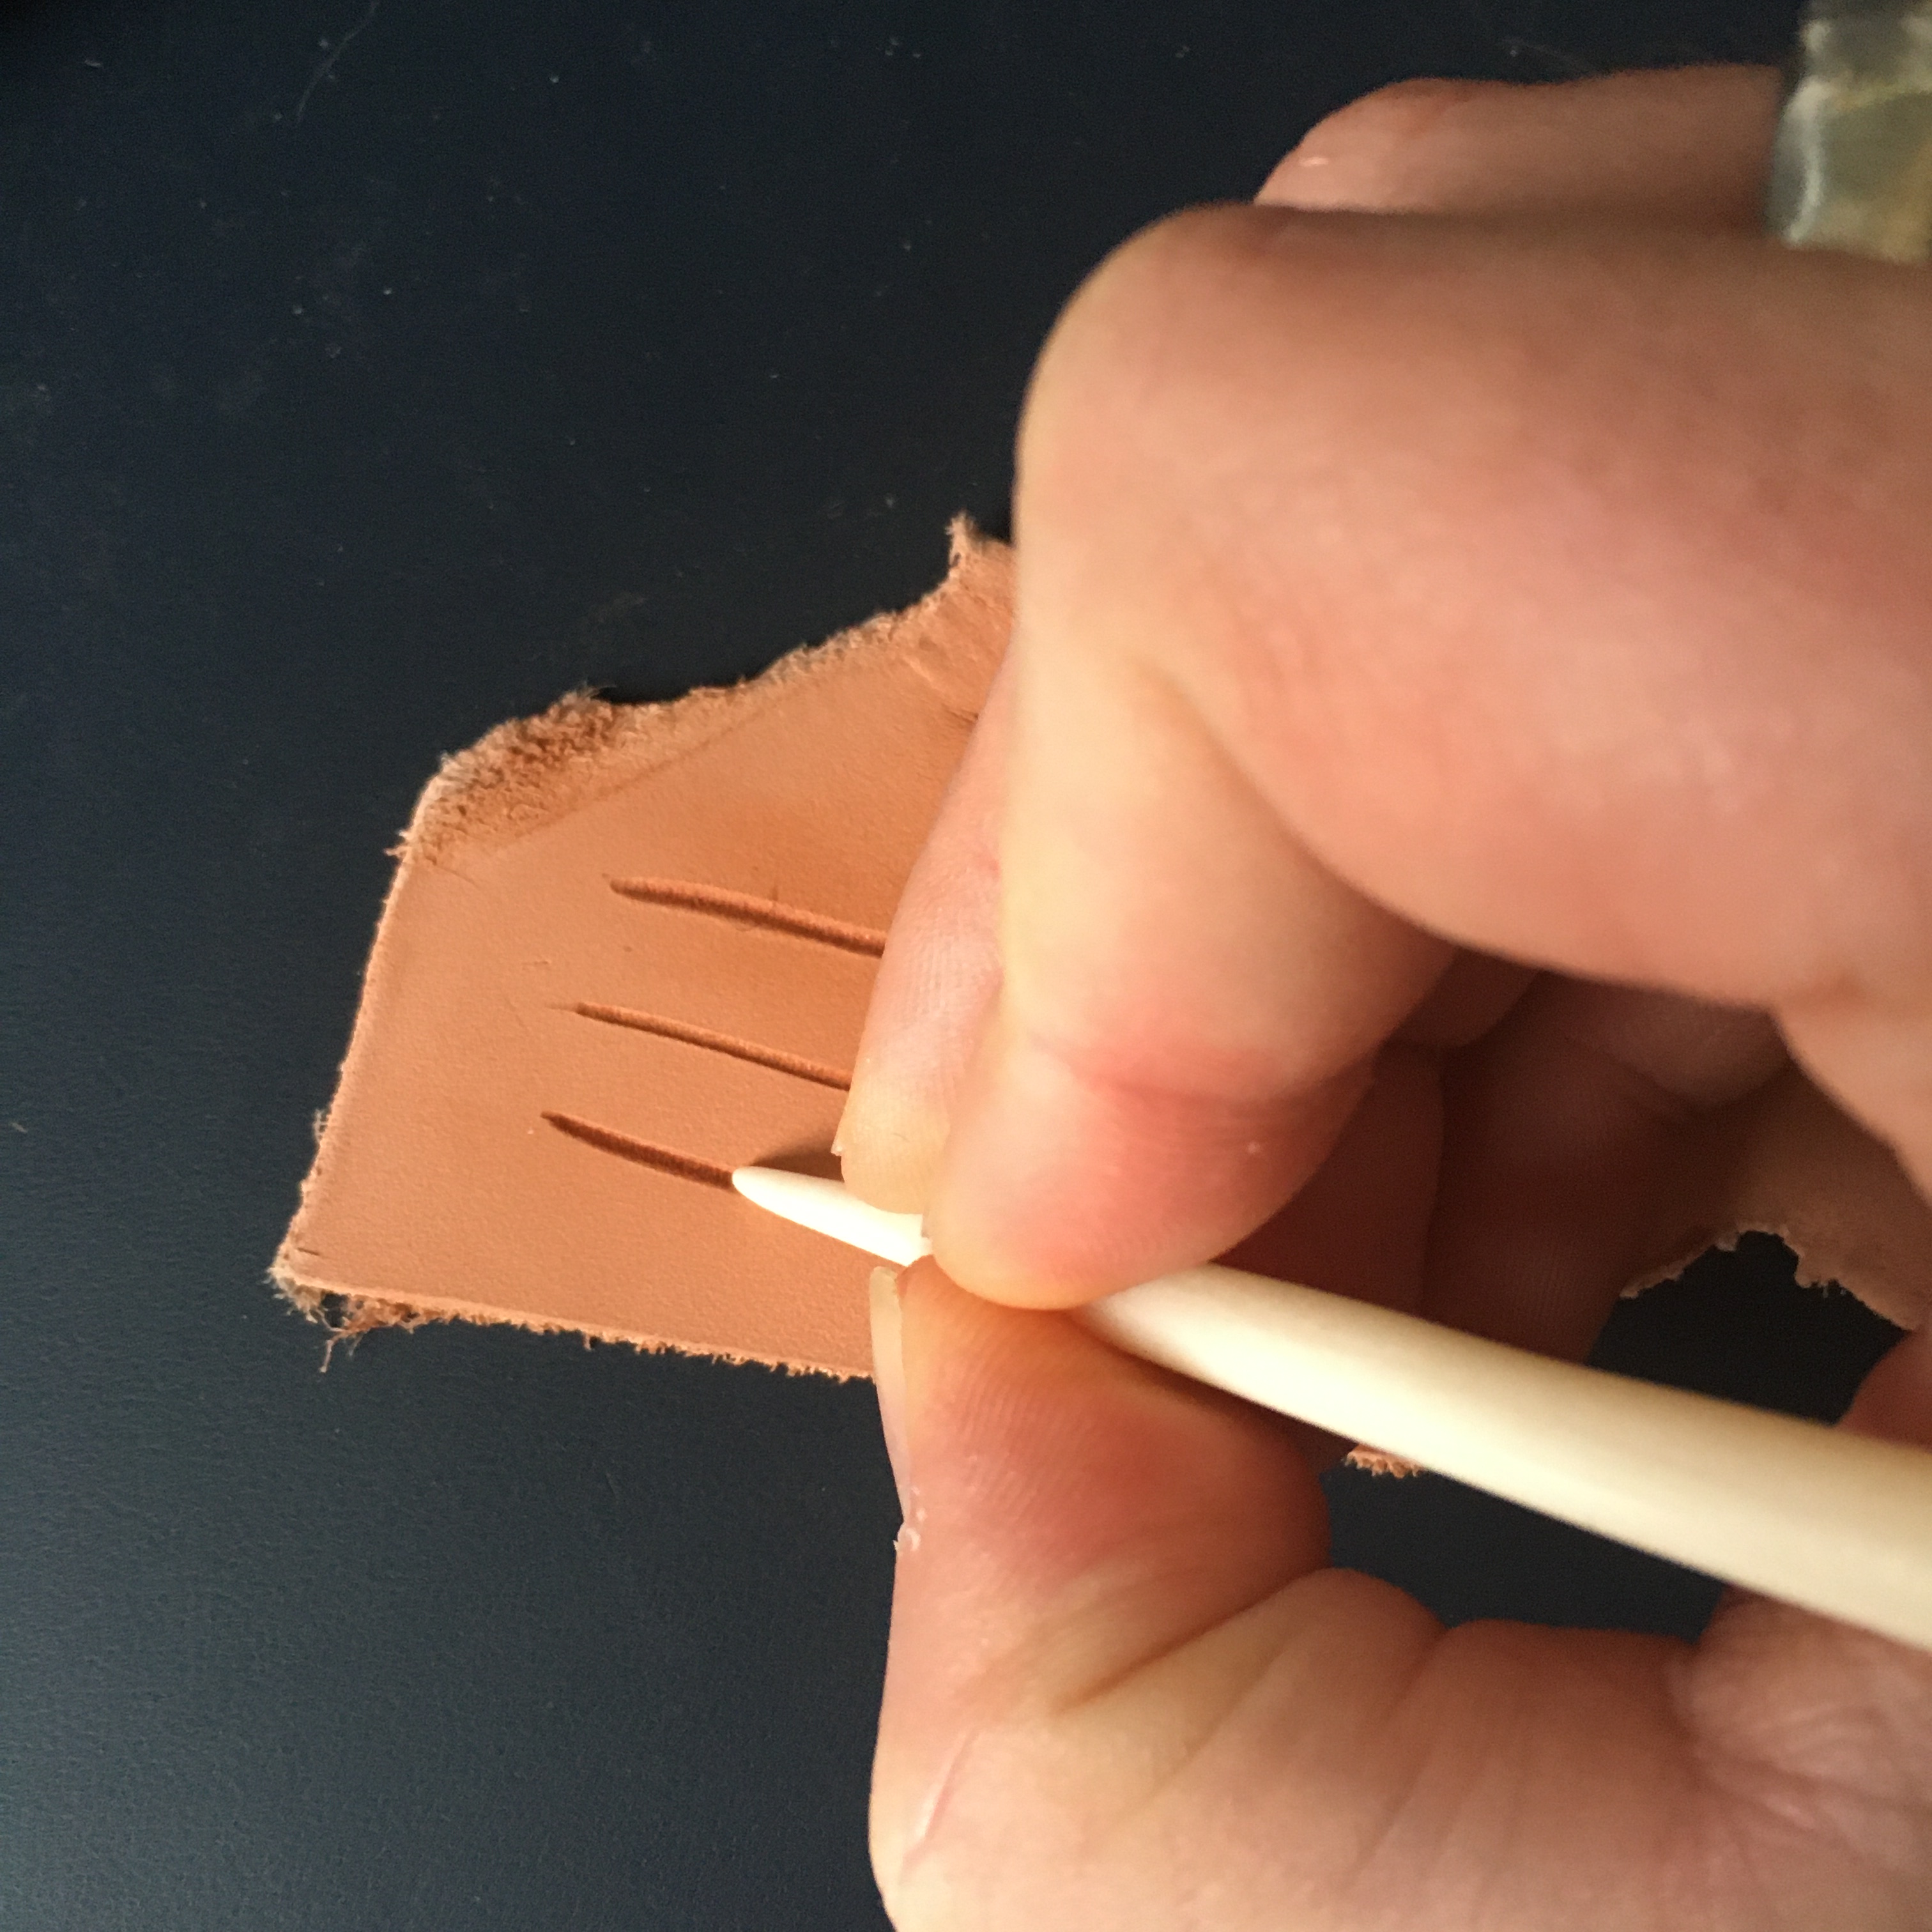
Starting and ending a line cleanly might take some practice. One option is to make a dot at the start and end, then drop the point into one dot and drag it to the other. Spin the workpiece around and do the same thing starting at the other dot. For a complex design, you can also start off by stopping your line a little short – you can always “finish” it by angling your tool and just pressing the tip in after the fact, once you can see how two intersecting lines will interact.
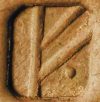
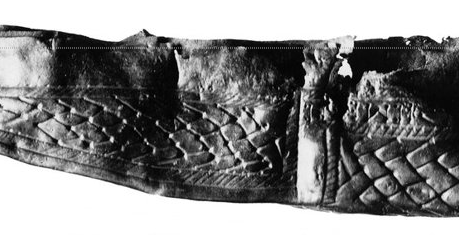
In this image from a seax sheath found in Trondheim, you can see that the maker used deeply impressed dots to mark the intersections of the interlace pattern. This can be really helpful, both for laying out a pattern and also making sure that the intersections of your lines are crisp.
Once you find an angle that works for you, you’ll probably want to hold the tool itself completely parallel to the desired line most of the time (below, left). This will create a groove that is symmetrical in cross section. As you start to move the tool out of parallel with the line (below, right), you’ll find that one side of your groove looks sharper than the other, while the side you’re leaning the tool to gets more rounded over. You can use this to your advantage if you’re doing interlocking knotwork, since it will help create the illusion of relief without using a beveler or anything else. Try making a simple crossover and see how this could work.
Curves are a little bit trickier – if you are using a tool with more of a chiseled tip, you may find you need to twirl the tool as you go. If you’ve used a modern swivel knife, it’s more or less the same motion. If not, it might feel weird, but if you use a plain blunt tip, you don’t have to worry about that.
Once you’re comfortable with markmaking, let’s take a look at some design motifs on some knife and seax sheathes from York.
Motifs and design
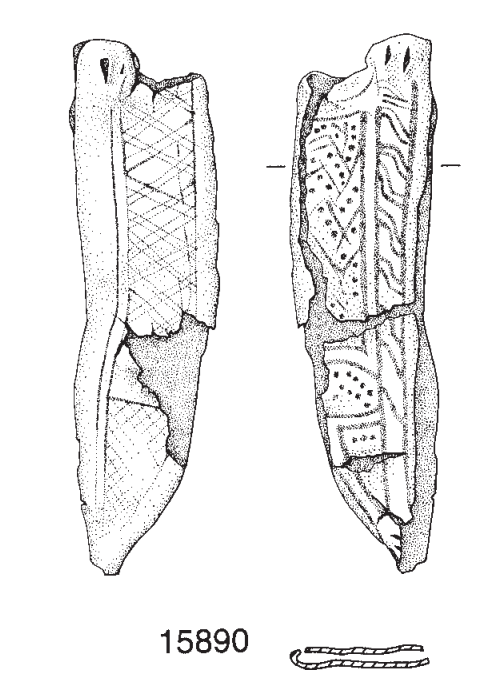
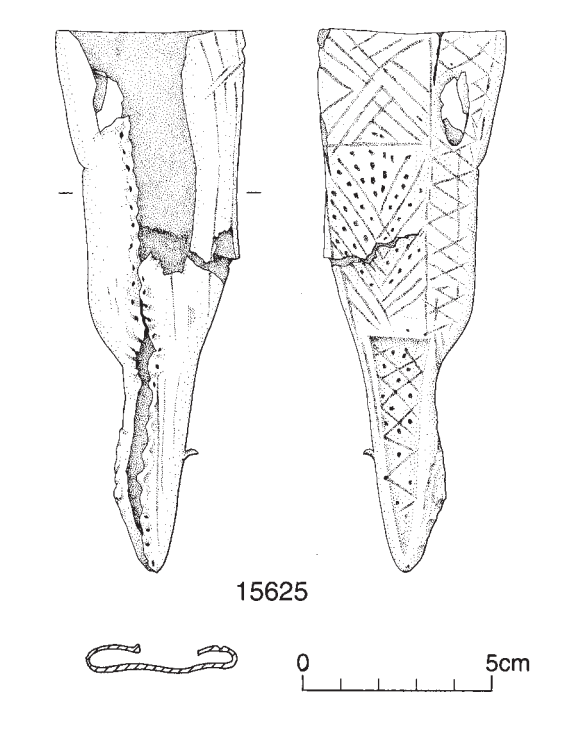
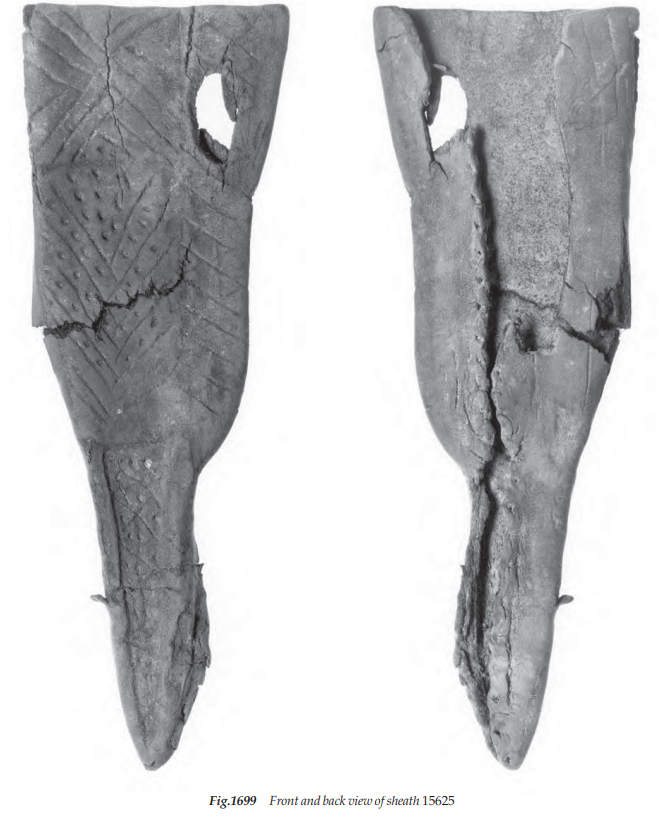
Based on the examples from York, the Viking-era sheathes tend to use a lot more abstract or geometric motifs – cross-hatching, chevrons, ring and dot, also some interlace designs, although these can be pretty simple.
Here are a few examples of sheathes – as you can see, many consist of simple geometric patterns: lines (zig zag or parallel), dots, or cross-hatching. Others use simple repeated motifs that look a bit like tetris blocks, while others have knotwork braids. Click on any of the images to see a larger version.

Using a straight-edge if you wish, try out each of the patterns below:
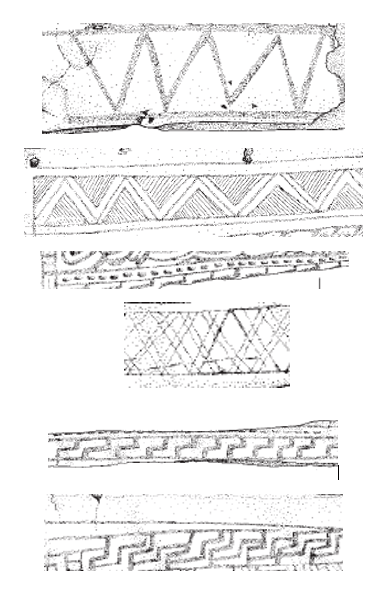
Once you’re confident with the patterns above, you know enough to attempt to reproduce the decoration on many of the examples from the York publication. You can either try a replica of one of the actual sheathes or create your own design by combining several of the patterns – dots and chevrons, tetris blocks, hatched zig-zags – separated by parallel lines.
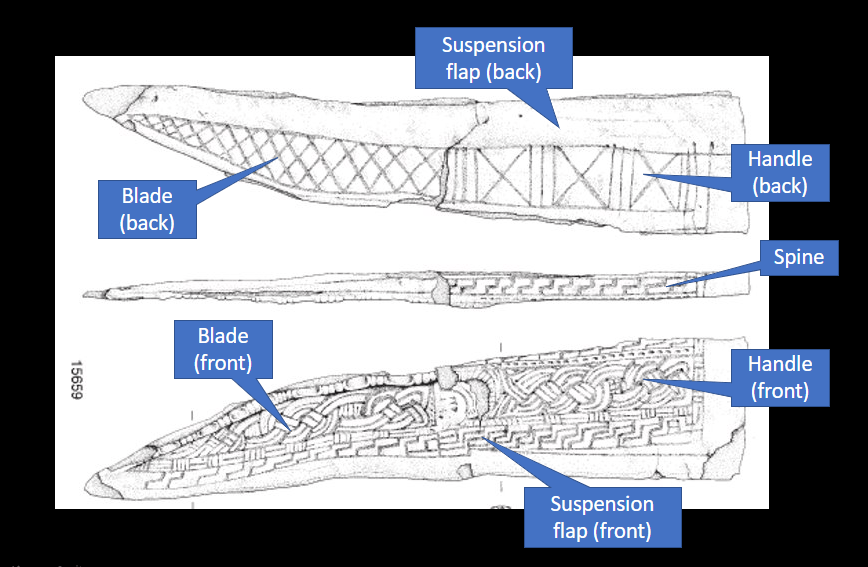
One thing to keep in mind is the overall composition; most of the historical examples use different patterns to distinguish the handle and blade portions (in most cases, the sheath actually enclosed the majority of the handle along with the blade), and sometimes a long narrow border along the closure edge (the suspension flap, where one or more straps were attached to hang it from the belt). When the front and back are both decorated (especially for seax sheathes), the back side is often much simpler than the front. The diagram below shows the seven “zones” of decoration for seax sheathes, which may be separated by simple lines or more complex borders.
Smaller knife sheaths follow the same general principles, although they may have fewer “zones” – usually the blade and handle are distinguished, and the suspension flap or closure edge may also be distinct. The back is either left plain or is a simpler version of the front.
For more inspiration, especially for slightly later examples, take a look at the Museum of London’s extensive collection of sheathes – they have over 100 items digitized for you to browse. The same techniques can be used, although by the 13th century, designs start to incorporate more curving plant motifs or heraldic imagery on escutcheons (shield shapes). Experiment and you can create a totally original design using historically accurate techniques and materials. Enjoy!
