
As a general rule, I like to minimize my “future creep” at events, and one easy way of doing that has been to use period storage/carrying containers for most of my belongings so that I do not have modern plastic bins or duffel bags to hide. While the “Viking frame purse” based on finds of wooden handles from Hedeby, Birka, and elsewhere is a popular shoulder-bag solution among reenactors, most of the ones I have seen go by are more handbag or satchel-sized (handles between 20 and 3ocm long). However, there are several finds of handles that are substantially longer than that (this article provides a nice overview of the genre), including two from Haithabu that are over 40cm long (see below). After seeing a few reconstructions that use some form of netting or sprang for the attached bag, I decided to make one and see how it might work as an alternative to a large modern gear bag for my clothes and small essentials. The following post summarizes the construction process and includes a demonstration of carrying capacity. The process also answered my question about why the sprang fragments mostly seem to have been sewn onto the handles separately rather than woven directly on the handles themselves, as might first seem like a logical choice.

Handles
The handles are replicas of the longest example of a bag handle found at Haithabu (HbH.119.014; measures 49.6 cm in length). Of the ten wooden handles from Haithabu, half are carved from maple and half from ash (Westphal 2006: 80), and since I had a nice piece of ash on hand already, that’s what I used. To ensure that the shape and dimensions were accurate, I enlarged the published drawing to full scale and transferred it to a cardboard template.
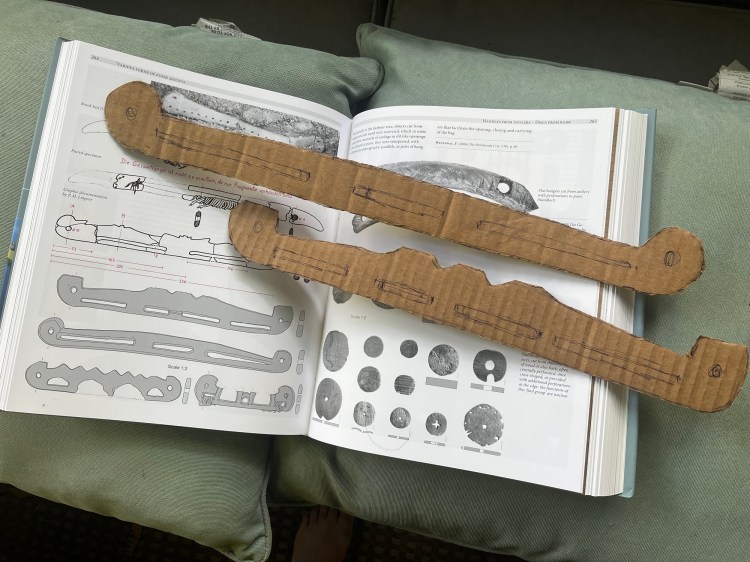
As shown in the published drawings and in the first photo, the handles are not just flat laths with perforations–they are shaped in three dimensions and have no sharp edges or angles, which makes sense to avoid unnecessary wear on the netting or user discomfort. After roughing out the shape, I used a drawknife, spokeshave, and a small slojd knife to refine it. The handles got two coats of linseed oil and were left to dry for several days.


Netting
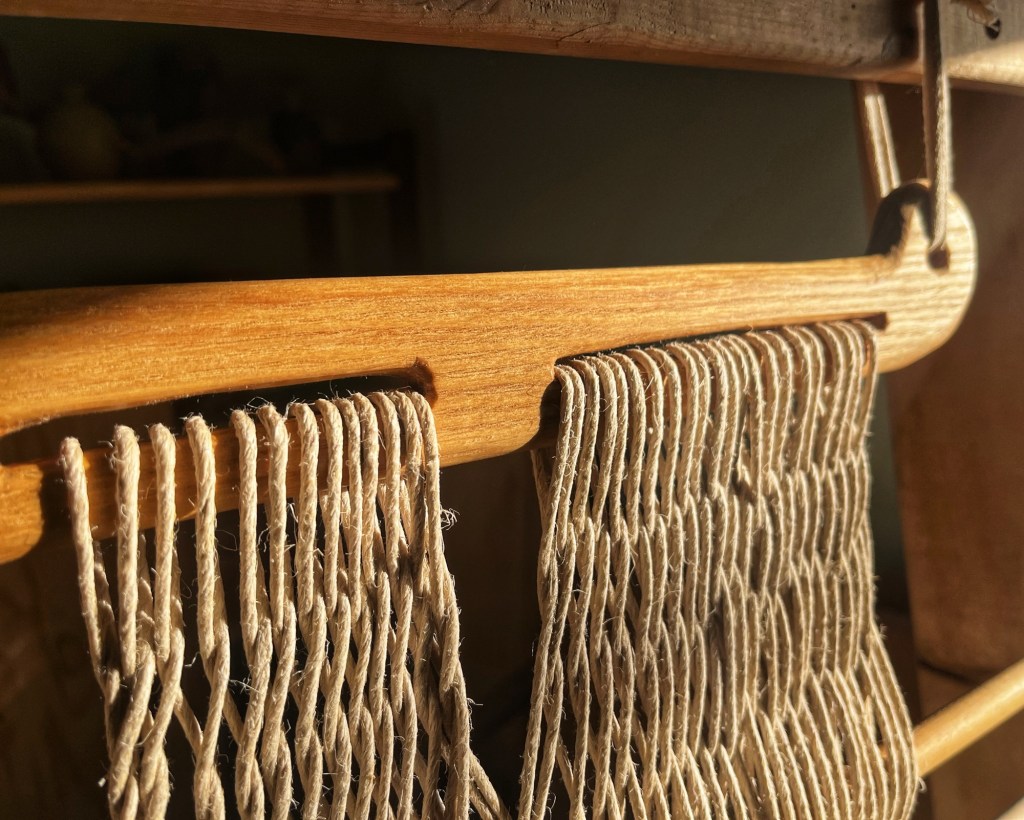
The fragments of preserved sprang were not enough for me to draw any useful conclusions about the pattern, and the two large Haithabu handles did not have any preserved textile anyway. I had no prior experience with making sprang, but it turns out that a basic interlink (one warp forward, one warp back, offset on alternating rows) is fast, easy, and nice and stretchy. I did a few test bits with scrap yarn to learn the technique and then set to work on the real thing. If I lived in a post-and-beam building, I would likely have hung one handle from a beam and attached the other to a weight on the floor. Instead, I built a rectangular frame out of some lumber in my garage and attached my handles to the upper and lower crosspieces using twine (at left, below), which quickly snapped under tension, and then some sturdier twill tape, which worked well. I warped up with 2.5mm plied hemp twine, leaving about 80cm of warp length between the two handles. The wider slots on either side each received 22 wraps, for a total of 44 warp threads (22 front, 22 back), and the center one got 12 wraps (initially 13, which I discovered after the math didn’t work on the first few passes–oops) for 24 warp threads. Continuous warping of all three slots was not viable, since it created an awkward diagonal warp, so instead each slot is warped as its own separate system. I also needed to figure out how to span that gap in the sprang without adding excess strain. After a little bit of trial, I decided to do the first row of sprang in each system separately and then connect all three systems starting with the second row.


Fail gallery, left to right: warping in process; too deep a gap; too much strain.
The actual sprang weaving took less than 30 minutes and was so unremarkable that I took almost no pictures during the process. Once complete, I twisted a loop in the center of one of the outermost warp threads and chained my way across to form a center seam. The sides were sewn up using short lengths of the same twine as the sprang netting, and I left enough of a gap at the top to allow the mouth of the bag to open about 30cm between the handles.

I wanted to test it immediately, so I used a length of twill tape as a strap and filled the bag with the contents of my laundry basket. The overall loss of warp length during the weaving process was minimal, since it is a very loose weave, and the bag depth when laid flat is only a few centimeters short of the original warp length. Because it is sprang rather than netting, the expansion stretch is almost all horizontal, so it doesn’t sag or lose depth as it’s loaded, it just stretches at either end.
For a more permanent strap, I wanted something that was narrow enough at the ends to pass through the handle holes but wide enough in the middle to not dig into the shoulder under a heavier load. While I could have cut a single tapered strap that would achieve this, instead I used three small scraps attached using a join found on other leather fragments from Haithabu (Groenman van Waateringe 1984, pl. 19). All told, I think the final product works well, and aside from the nearly 100m of twine required for the sprang, requires minimal materials, little skill, and takes up very little space when not in use.

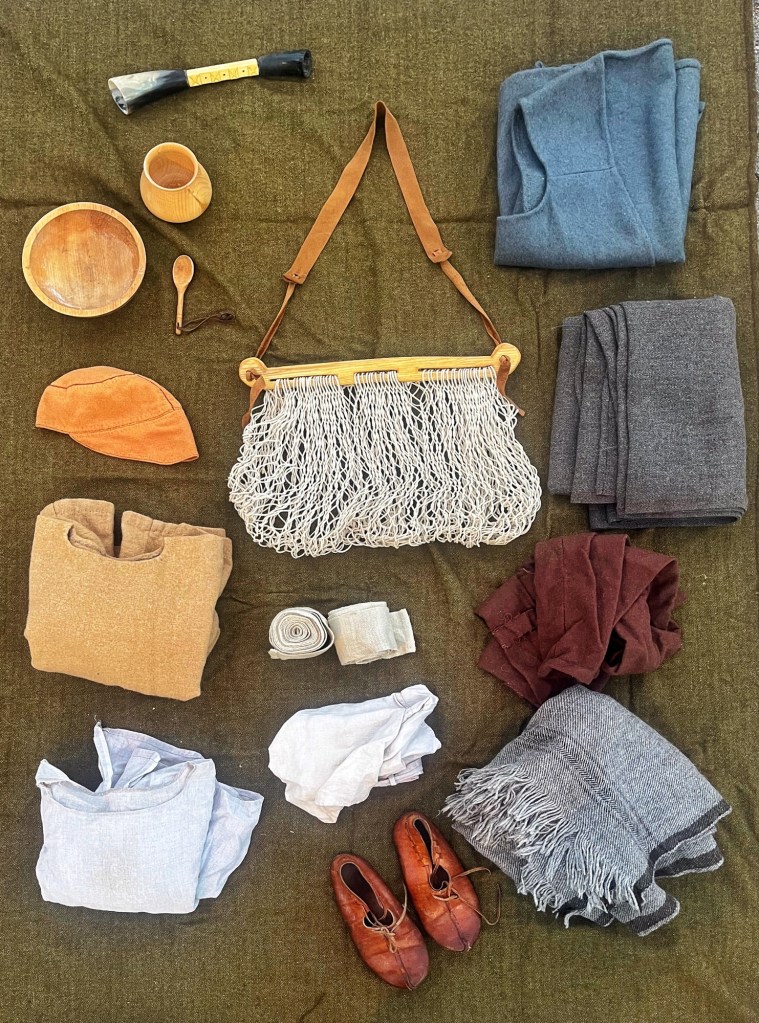
The biggest question in my mind was how spacious the finished project would actually be. I dragged out a heap of my Viking Age kit and decided to find out. The one obvious downside to the netting approach is that small items will fall out if thrown in there loosely. The contents are also not protected from the elements or from impact. My solution was to treat the whole thing like a tidier and more versatile equivalent of bundling everything up in a cloak or blanket. I took a heavy cloak measuring 2m x 1m, folded it in half to create a 1m square, and stuffed it into the bag. I then loaded everything else inside so that the cloak tucks around all the other items. It would be easy enough to just wrap small or fragile items together in a spare tunic or even a scrap of fabric, but the cloak-wrapped method would also have helped keep the contents dry in a drizzle.
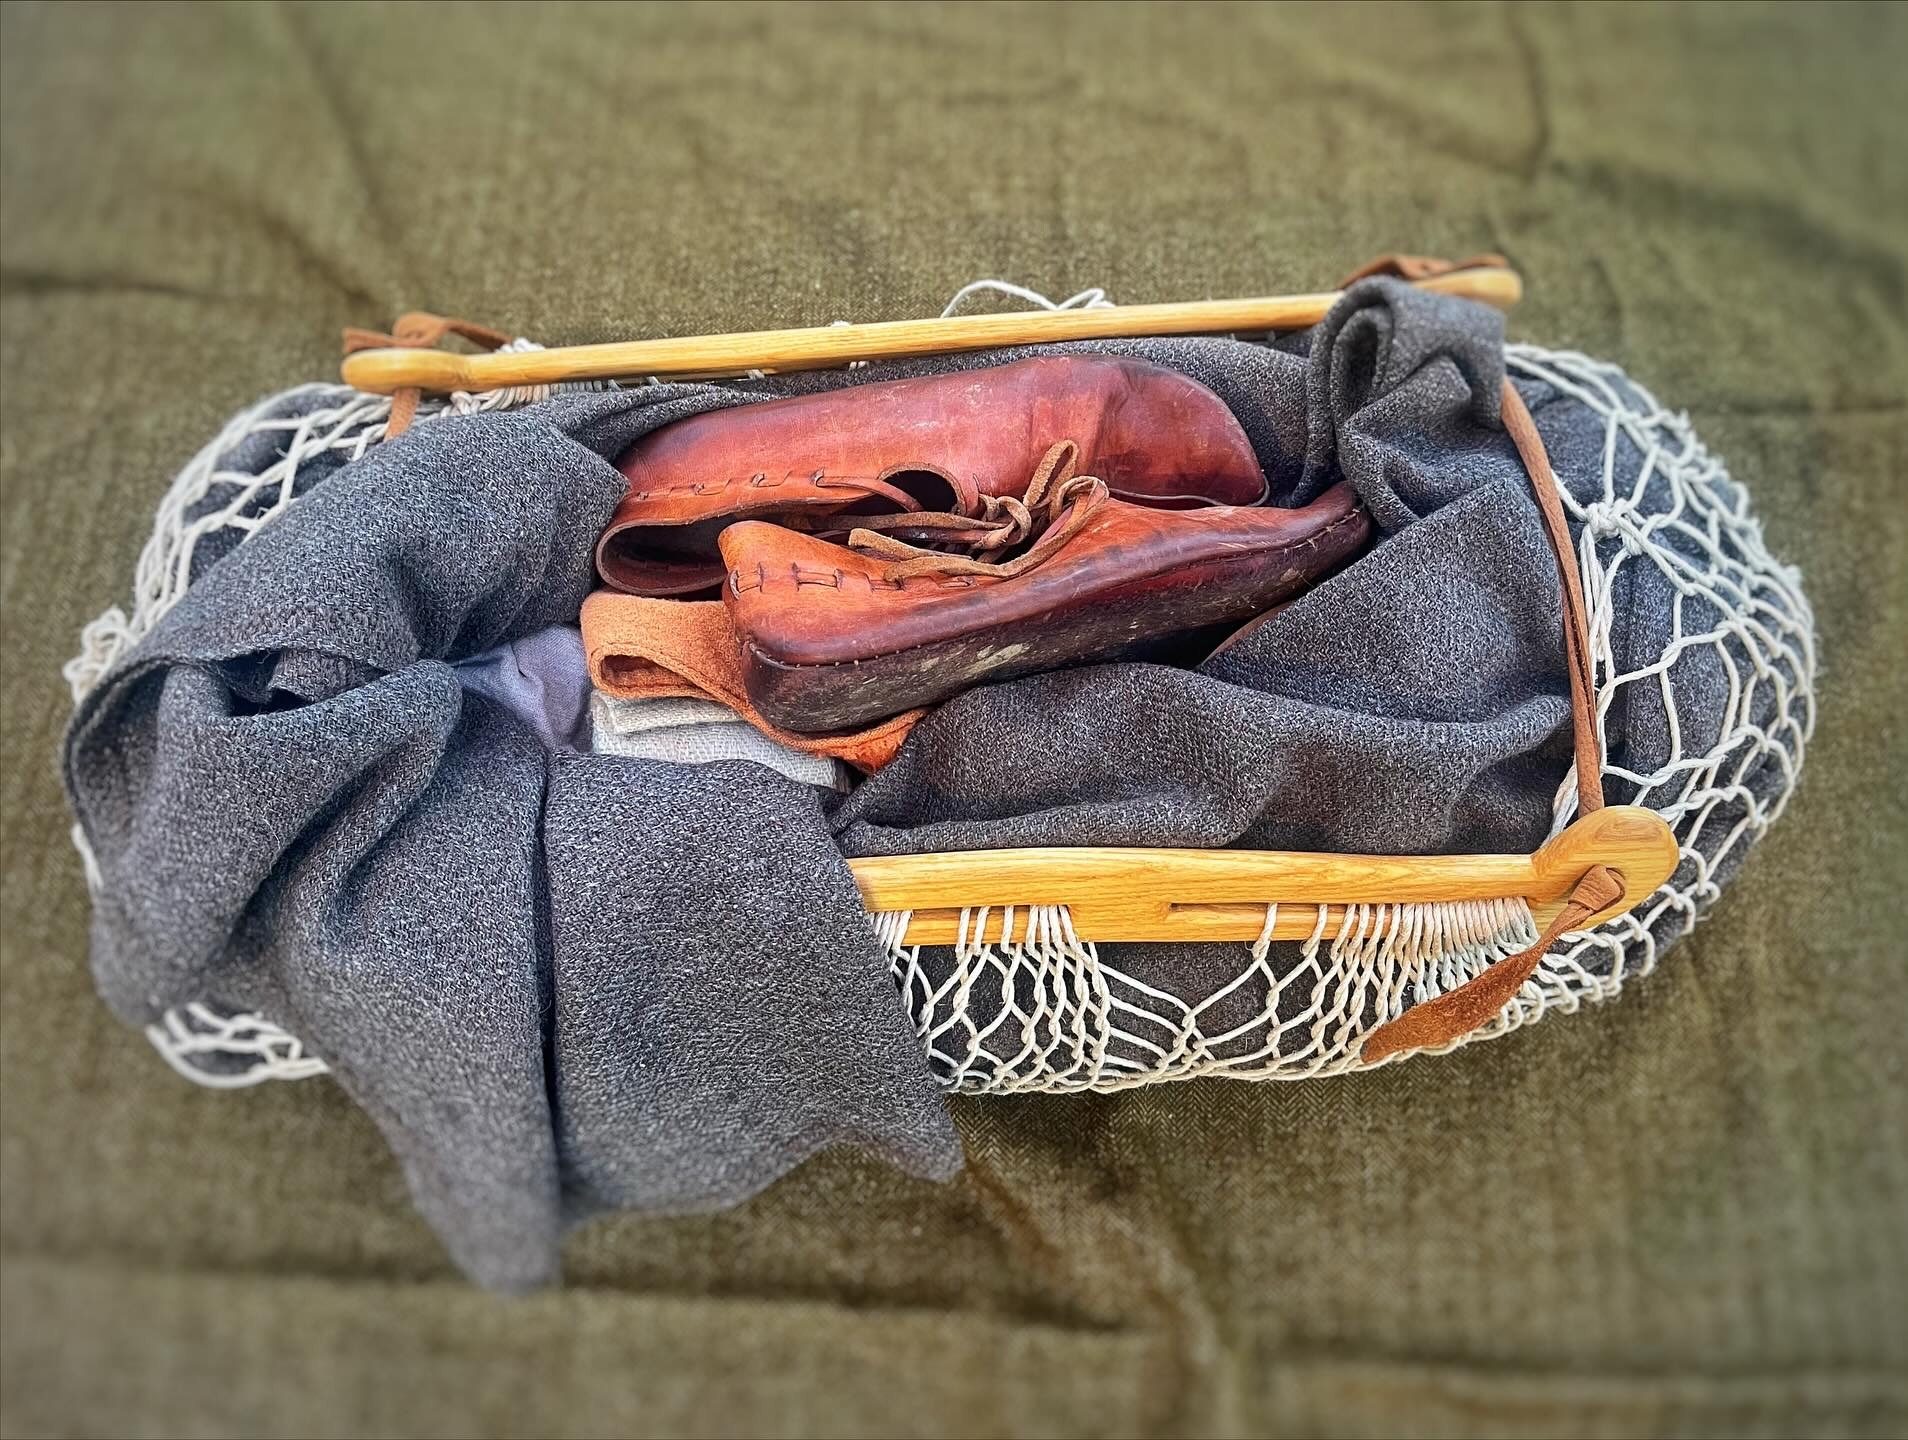
Pictured below are all the items I was able to fit inside the bag, including all of my 9th c. Frisian kit. Clockwise from top right: Hedeby lodenwams (heavy wool vest), heavy cloak, wool trousers, a second, slightly lighter cloak, shoes, linen underpants, legwraps, linen undertunic, wool tunic, Rasquert cap, a wooden cup, bowl, and spoon, and my Britsum pipe. The bag is fairly close to capacity, but could easily contain my entire soft kit for an event.

Lessons Learned
My initial goal was to see whether a bag like this would be a comfortable and useful way to carry my belongings around–particularly, whether sprang would offer any particular advantages over other materials. The answer was yes, all around, starting with production. To make a bag this size out of any other material would require at least a square meter of textile or leather that could likely be put to better use elsewhere in period. Unless pieced together from many smaller bits or scraps, that would be enough leather for me to make at least four pairs of shoes (depending on the style, possibly more) or enough cloth to make most of a tunic (everything but the sleeves and side gores). Compared to the labor involved in hide tanning or woven cloth production, it seems likely that it took less time and effort to produce 100m of coarse two-ply hemp twine. For a utilitarian item, it seems like a very efficient use of materials. The bag can adapt to fit many different shapes of cargo and the netting can easily be tied back together if broken, and the whole thing can be made from two bits of ash split lath and a ball of twine the size of a grapefruit.
However!!! The most significant “lesson learned” is that there is a very practical reason that the extant bag handles with sprang remnants have the sprang sewn to the handles with a separate thread and were not woven using the handles as the loom beams the way that I did. It turns out that it is exceptionally annoying to warp up the handles directly, because the twine has to pass through the slits in the handle. If warped on a sprang loom, there is plenty of clearance at the top and bottom to pass a loaded shuttle or a large ball of twine or yarn through, which is necessary if you are “leading” with the unused warp (see below, right). To warp the handles directly, you have to lead with the free end and continue to pass it back and forth through the slots in the frame while drawing from the ball of twine (below, left). This becomes more and more difficult as the number of warp strands (and thus the amount of friction) increases.

While it was still manageable for this project, direct-warping was annoying and it actually took longer to warp the handles than it did to weave the sprang. For this reason, I strongly suspect that handles with very narrow slots would not have been warped directly. I plan to make a second iteration using the slightly smaller of the large Haithabu handles and will warp this one onto two removable sticks and use a separate cord to attach the sprang to the handles. This also eliminates the question about how to span the gap between the slots. All around, it seems like the more sensible practice, since it solves several annoyances at once and does not alter the key properties of the sprang. So yes, you can use the handles as the “loom,” but it is more trouble than it is worth and I would not do it this way again.
Sources
Groenman van Waateringe, Willy (1984). Die Lederfunde Von Haithabu. Hedeby-Ausgrabungen in Haithabu.
Schietzel, Kurt (2014). Spurensuche Haithabu, Neumünster – Hamburg.
Vlasatý, Tomáš (2021). Reconstruction of the “Viking bag.” In: Projekt Forlǫg : Reenactment and Science [online]. [2021-01-08].
Westphal, Florian (2006). Die Holzfunde von Haithabu. Die Ausgrabungen in Haithabu 11, Neumünster.
